Help Center Import app
Import categories, sections, articles and comments
Learn how to import categories, sections, articles and comments into Zendesk Guide using our Help Center Import app.
Learn how to import categories, sections, articles and comments into Zendesk Guide using our Help Center Import app.
When creating a Help Center it’s important to choose the right Zendesk Guide theme, but populating your knowledge base with content is equally important. This guide describes how to import categories, sections, articles and comments using our Help Center Import app for Zendesk Support in the Zendesk App Marketplace.
The process for importing content into Zendesk Guide can be summarized as follows:
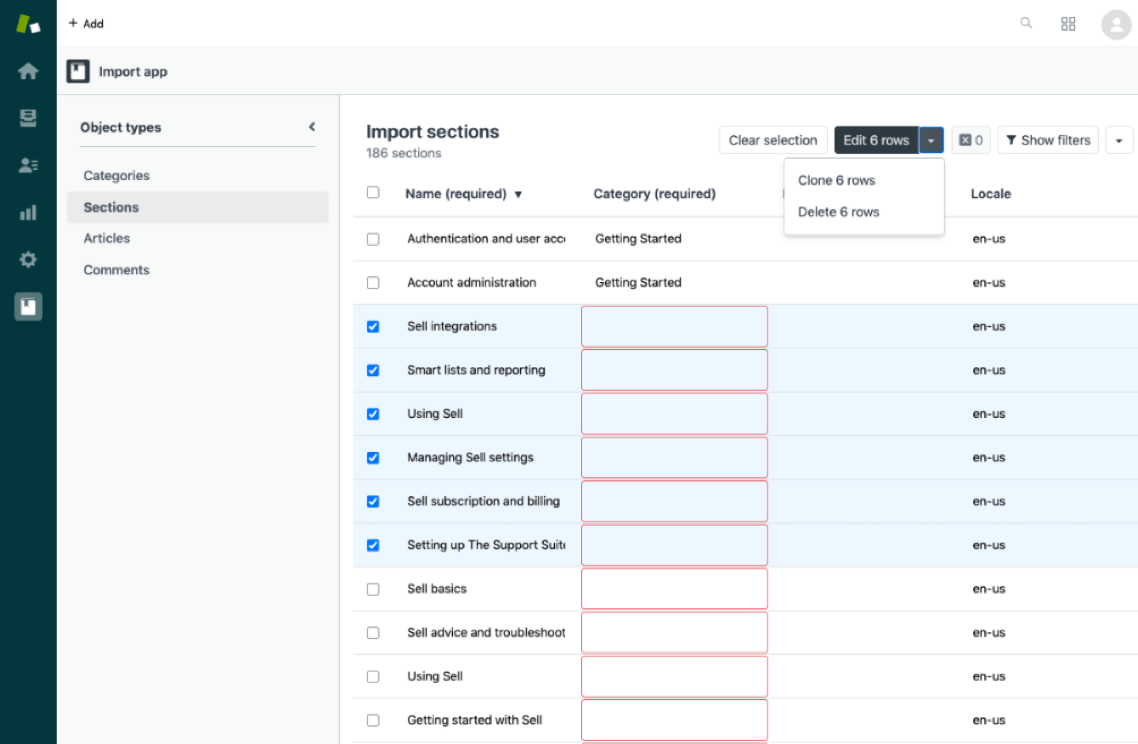
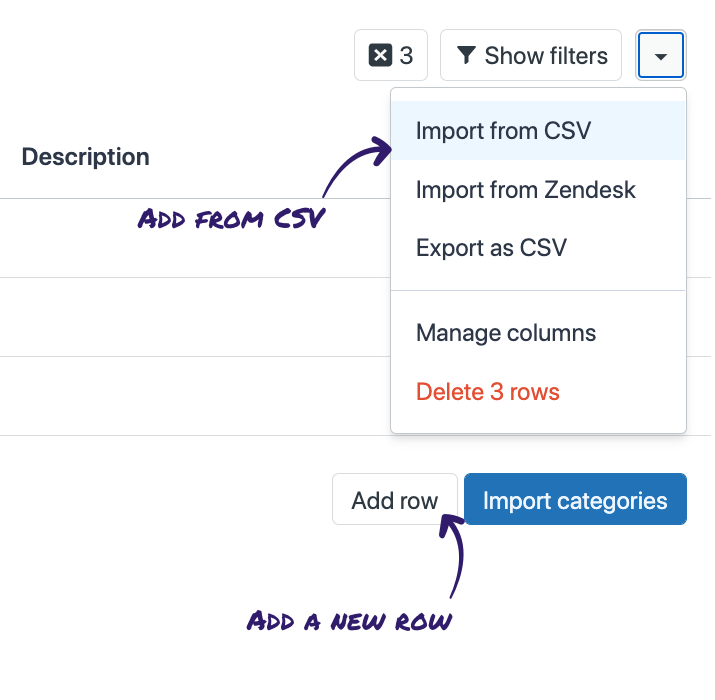
The first step is to create rows representing your objects within the app. This can be done one at a time by clicking on the Add Row button and entering the data manually, or in bulk by adding rows from a CSV file.
The app provides an editable table in which you can:
When creating rows or editing individual fields, you will be visually alerted to potential validation issues.
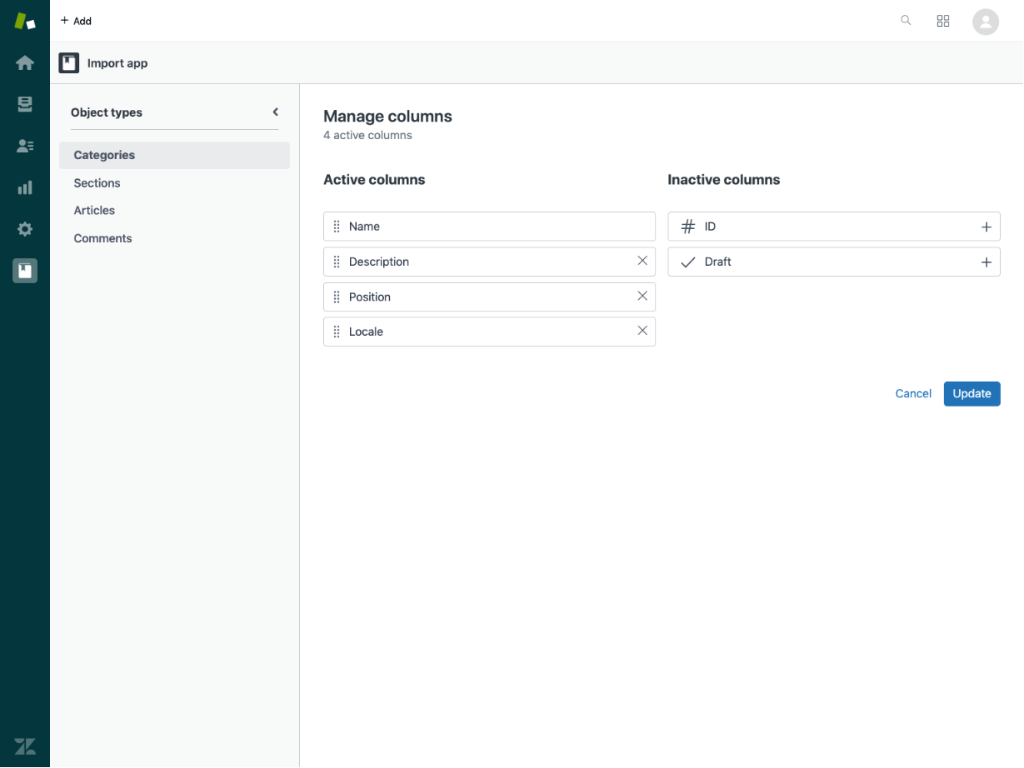
Table columns can be added, removed and reordered by clicking on the Manage Columns button within the table’s dropdown menu.
The table (and each subsequent import) supports up to:
Once you have populated the table with your data, the next step is to review it before starting the actual import. To make this easy, the app allows you to:
Only the columns present within the table will be imported.
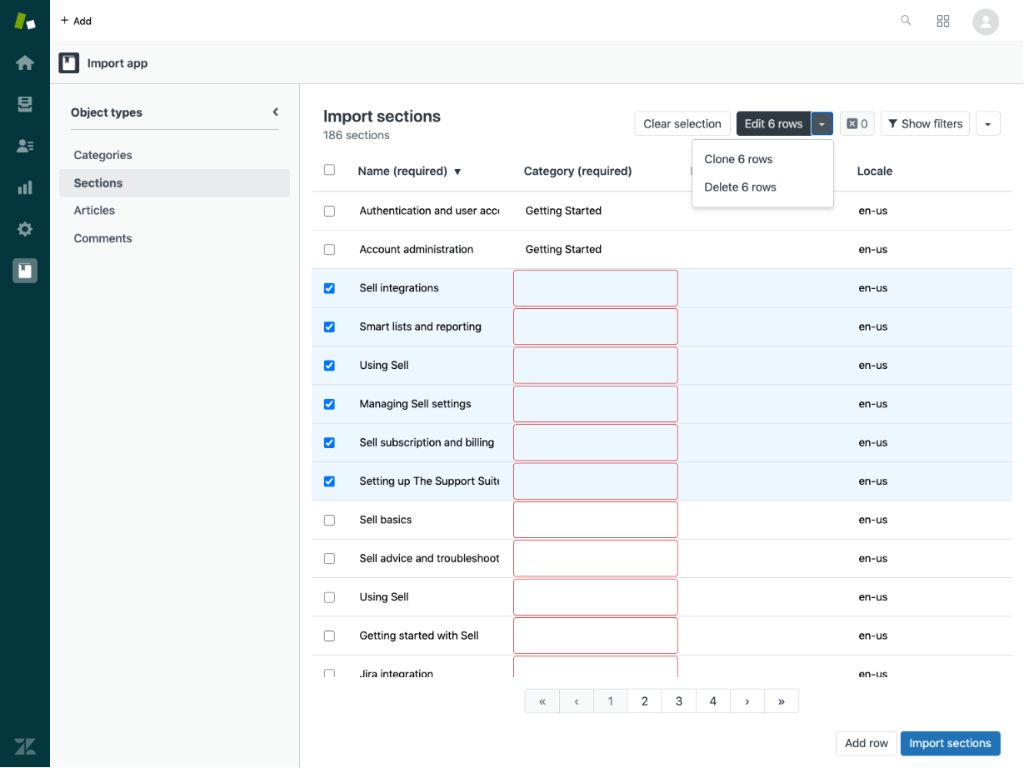
If you have more than 50 rows to import, pagination links will allow you to view each page.
If you’re satisfied that the data is complete and accurate, you can import all rows by clicking the Import button.
A progress indicator will guide you through the import itself. When the import has finished you can download a completion report containing all data, the newly created record IDs and status information (created, updated or failed with details where necessary).
In order to ensure that your CSV file can be imported properly:
The following table outlines the column headers that can be specified when creating a CSV file containing your category data:
| Name | Type | Description |
|---|---|---|
id | integer | The ID of the category (required when updating a category) |
name | text | The category name (required) |
description | text | The category description |
locale | text | The category locale (required when updating a category) |
position | integer | The position of the category |
draft | boolean | True if the category is a draft |
To update an existing category you must provide both an id and locale.
If specifying a locale you must ensure that it corresponds to a language that is supported by your Help Center.
The following table outlines the column headers that can be specified when creating a CSV file containing your section data:
| Name | Type | Description |
|---|---|---|
id | integer | The ID of the section (required when updating a section) |
name | text | The section name (required) |
description | text | The section description |
category_id | integer | The ID of the parent category |
parent_section_id | integer | The ID of the parent section (if nested sections are used) |
locale | text | The section locale (required when updating a section) |
position | integer | The position of the section |
draft | boolean | True if the section is a draft |
sorting | text | The sort order of articles within the section (options: manual, creation_desc, creation_asc or title) |
As with categories, to update an existing section you must provide both an id and locale.
The following table outlines the column headers that can be specified when creating a CSV file containing your article data:
| Name | Type | Description |
|---|---|---|
id | integer | The ID of the article (required when updating an article) |
title | text | The article title (required) |
body | text | The article body, which can contain HTML |
section_id | integer | The ID of the parent section (required) |
permission_group_id | integer | The ID of the permission group which defines who can edit and publish this article (required) |
user_segment_id | integer | The ID of the user segment which defines who can see this article (required) |
author_id | integer | The ID of the article author |
locale | text | The article locale (required when updating an article) |
position | integer | The position of the article |
promoted | boolean | True if the article is promoted |
draft | boolean | True if the article is a draft |
comments_disabled | boolean | True if comments should not be allowed on the article |
label_names | text | A list of label names to apply to the article, separated by a | |
As with categories and sections, to update an existing article you must provide both an id and locale.
The following table outlines the column headers that can be specified when creating a CSV file containing your article comment data:
| Name | Type | Description |
|---|---|---|
id | integer | The ID of the comment (required when updating a comment) |
body | text | The comment body, which can contain HTML |
article_id | integer | The ID of the associated article (required) |
author_id | integer | The ID of the comment author |
locale | text | The article locale (required when updating an article) |
As you may have guessed, this app can be used for more than just imports. Examples of other use-cases made easy by the app include:
And the list goes on.
